

Use a nearby camera(s) to automatically take a picture or video clip whenever a door with a door sensor opens or closes. An interior or exterior camera pointed directly at the front door works best. Here are some steps to help do this.
How to capture a picture or video clip whenever a door opens or closes
- Launch and login to the Smart Home Monitoring app using your MyRogers username and password.
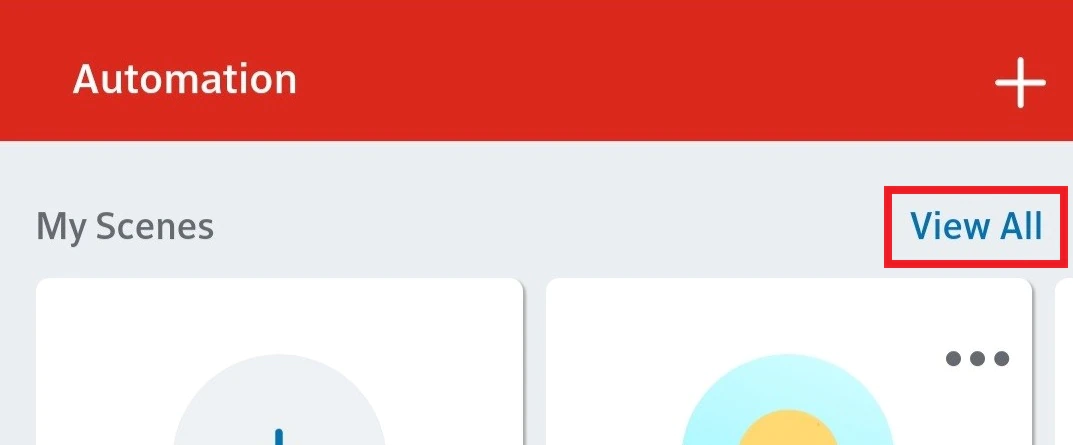
- Select the Automation tab
- Select View All beside My Scenes
- Select the Rules tab then Create Custom
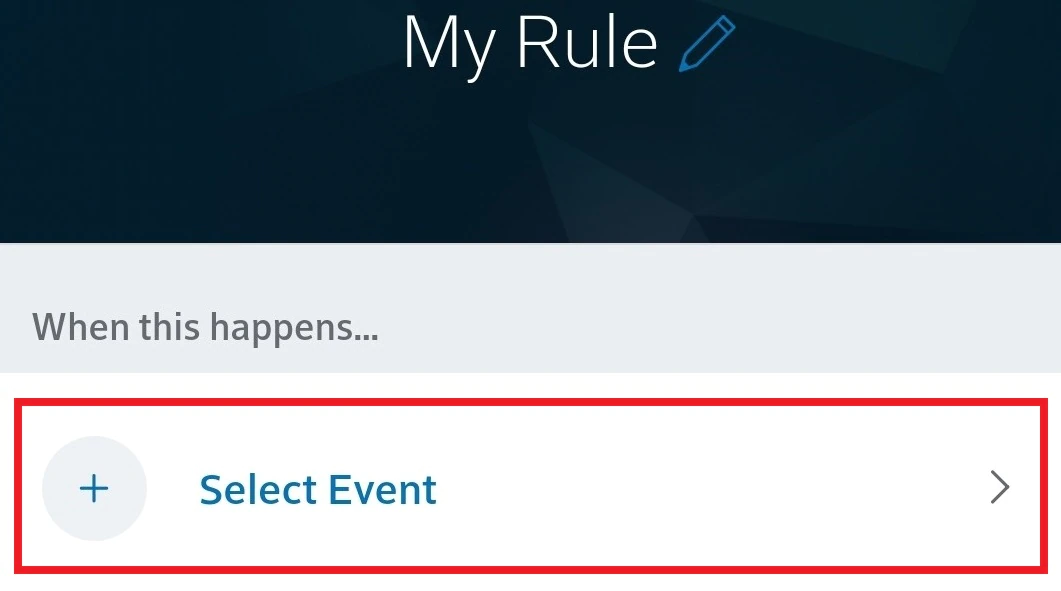
- Under When this happens, press Select event
- Select Doors then Continue.
- Select the door sensor you want to activate the camera by its name, then select Continue.
- Note: If you only have one door sensor, skip this step and go straight to the next screen.

- Note: If you only have one door sensor, skip this step and go straight to the next screen.
- Choose Open or Close then select Add. You’ll return to the rule creation screen
- Now, press Select Event under Do this.
- Select Cameras then Continue.
- Select the camera you want to activate when the door opens or closes then Continue. If you only have one camera installed, it will go directly to Step 12.
- Note: Only one camera can be activated by each rule. To activate additional cameras when this event occurs, you’ll need to create another.
- Choose the action you want the camera(s) to take when the Rule is activated by the motion sensor - you can either Take picture or Take Video Clip – then select Continue. You’ll return to the rule creation screen
- Next, select Add notification.

- Select Send to contact(s) then check the boxes by the names on file you want to receive the picture or video clip.
- See Using the Smart Home Monitoring App for where to manage your contact options.
- There is an option for No notification, but you need someplace to send the picture/video for this rule type
- Select Continue. You’ll return to the rule creation screen and now see where the notifications are listed.
- Select the pencil next to My Rule to give this new Rule a name.
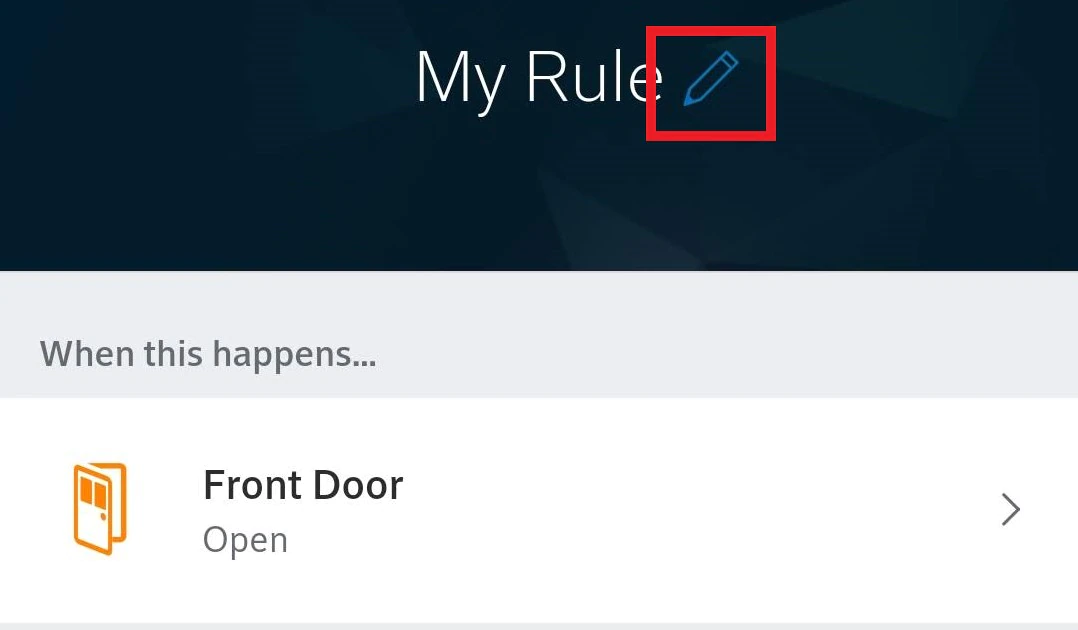
- Enter a new name into the Rule name. Once done, select Save.
- Upon returning to the Rule creation screen, select Save to finalize the new Rule.


You’ll now see the new rule at the top of the My Rules list (if sorted by Newest)