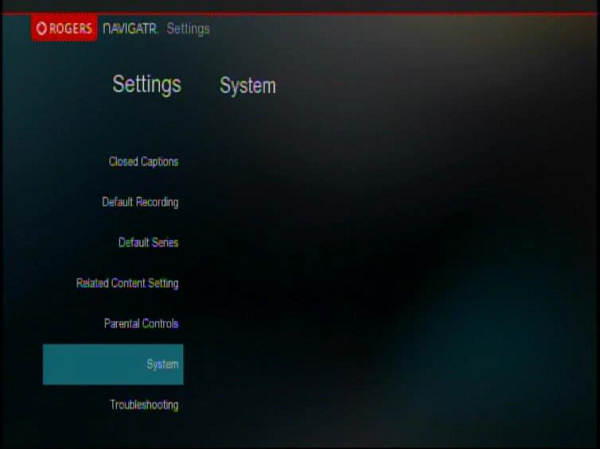
The following steps explain how to change the front panel display of the digital set top box using the Navigatr guide.
Change the Front Panel Display when the Digital Box is On
This feature will control how the display of the digital box will act when the digital box is turned on.
- Press [SETTINGS].
- Scroll to System and press [OK/SELECT].

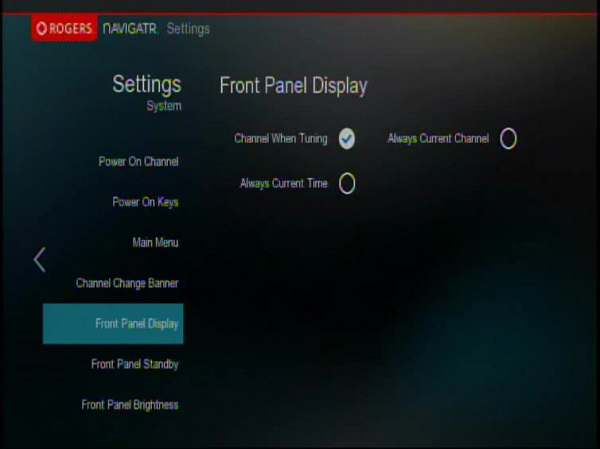
- Scroll to Front Panel Display and toggle the feature to one of the following using the [Arrow] keys:
- Channel When Tuning – shows channel on the front display of the digital box when changing channels, and will switch back to the time.
- Always Current Channel – always show the time on the front display of the digital box.
- Always Current Time – always show the current channel on the front display of the digital box.

- Press [EXIT] on the remote to save changes.
Change Front Panel Display when the Digital Box is Off
This feature will control how the front display of the digital box will act when the digital box is turned off.
- Press [SETTINGS].
- Scroll to System and press [OK/SELECT].

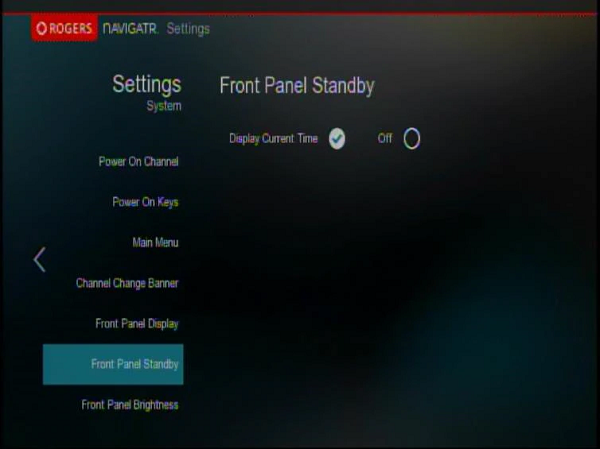
- Scroll to Front Panel Standby and toggle the feature to one of the following using the [Arrow] keys:
- Display Current Time – always show the time on the front display of the digital box.
- Off – will display nothing when the digital box is off.

- Press [EXIT] to save changes.
Change Front Panel Brightness
This feature will control the brightness of the front display of the digital box.
- Press [SETTINGS].
- Scroll to System and press [OK/SELECT].

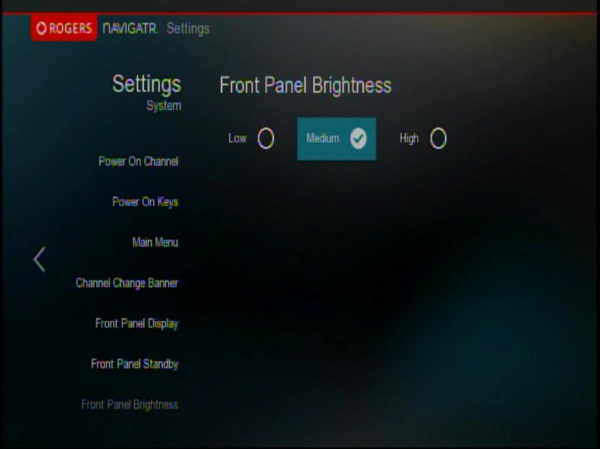
- Scroll to Front Panel Brightness and toggle the feature to one of the following using the [Left] or [Right] key:
- Front Panel Brightness – Default brightness is set to the Low option.
- Medium – will make brightness of the front display to medium level.
- High – will make brightness of the front display to high level.

- Press [EXIT] to save changes.


